Brother SQ9185 Sewing Machine: A Comprehensive Guide
This guide details the Brother SQ9185’s capabilities, mirroring user experiences and online resources. It’s a favorite for diverse projects,
from quilting to general sewing, offering a computerized experience.
The Brother SQ9185 is a computerized sewing machine gaining popularity among both beginners and experienced sewists. Often highlighted as a preferred machine for various projects – from everyday mending to intricate quilting – it stands out for its blend of user-friendliness and capability. Many users, even those owning multiple machines, consistently choose the SQ9185 for its reliable performance and versatility.
This model is frequently compared to other Brother lines like the Star 27S, Star 37S, and the Vesta Ministar series (Pink, Blue, Rose Violet, Rose Wine), as well as the XL2120, XL2120PRO, XL2121. However, the SQ9185 often emerges as a favorite due to its specific feature set and overall sewing experience. Online communities, such as Facebook groups dedicated to Brother sewing machines, are filled with positive reviews and helpful tips from fellow users.
Angela Wolf of PBS showcases the SQ9185’s suitability for quilting, emphasizing its potential beyond basic sewing tasks. Understanding its features, as detailed in online manuals and demonstrated in unboxing videos, is key to unlocking its full potential.
What’s Included in the Box: Unboxing the SQ9185
Unboxing the Brother SQ9185 reveals a comprehensive set of accessories designed to get you started immediately. Expect the main sewing machine unit itself, along with a power cord to ensure immediate operation. Several presser feet are included, offering versatility for different sewing applications – details on compatible feet are readily available online.
A set of needles caters to various fabric types, and a spool of thread provides a starting point for your first projects. Bobbins are also included, essential for the lower thread mechanism. The SQ9185 comes with a user manual, crucial for understanding its features and troubleshooting.
Often, you’ll find a cleaning brush to maintain the machine’s internal components, preventing dust and lint buildup. A screwdriver is provided for basic maintenance and adjustments. Unboxing videos online visually demonstrate each component, clarifying their purpose and placement. Remember to carefully inspect all parts upon arrival, ensuring everything is present and undamaged.
Key Features and Specifications
The Brother SQ9185 boasts a range of features making it ideal for both beginners and experienced sewers. It’s a computerized sewing machine, offering 82 built-in stitch patterns, including decorative and utility stitches. A key feature is the automatic needle threader, simplifying a traditionally tedious task. The machine includes a convenient quick-set bobbin system for easy and efficient bobbin winding.
Specifications include an adjustable sewing speed, allowing for precise control, and an LCD screen for stitch selection and settings. It handles various fabric weights effectively, and the free arm design facilitates cuff and sleeve sewing. The SQ9185 offers adjustable stitch length and width, providing customization options.
Users praise its reliability and consistent performance, often comparing it favorably to other Brother models like the Star series and XL2120. Online resources detail its capabilities for quilting and general sewing projects, highlighting its user-friendly interface.
Setting Up Your SQ9185
Initial setup is straightforward, ensuring a quick start to your sewing projects. Powering on and preparing the machine for use is clearly outlined in the manual.
Initial Setup and Powering On
Unpacking and preparing your Brother SQ9185 is the first step towards enjoying its features. Begin by carefully removing all packaging materials and ensuring all included accessories are present – refer to the unboxing guide for a complete list. Place the sewing machine on a stable, level surface with adequate space for your projects and comfortable operation.
Before plugging in the power cord, verify that the power switch is in the “OFF” position. Connect the power cord to a grounded electrical outlet. The SQ9185 features a simple power switch, typically located on the side of the machine. Flipping this switch to “ON” will illuminate the display screen and initiate the machine’s self-check process.
The initial screen display may prompt you to set your preferred language and date/time. Follow the on-screen instructions, using the directional buttons and “Enter” key to navigate and confirm your selections. Ensure the presser foot is down and the needle is in the up position before attempting any test stitches. This safety feature prevents accidental operation. Refer to the SQ9185 manual for detailed illustrations and troubleshooting tips.
Winding the Bobbin
Proper bobbin winding is crucial for consistent stitch quality on your Brother SQ9185. Begin by placing the thread spool on the spool pin, securing it with the spool cap. Guide the thread through the thread guide, then through the tension disc – ensuring it clicks into place. Next, thread the end of the thread through the bobbin winder spindle.
Place an empty bobbin onto the bobbin winder spindle. Push the bobbin winder spindle to the right, engaging the winding mechanism. Hold the thread tail firmly for the first few rotations to prevent slippage. Press the foot controller gently to start the winding process. The machine will automatically stop when the bobbin is full.
Once full, disengage the bobbin winder by pushing the spindle back to the left and remove the bobbin. Trim the thread tail neatly. Insert the wound bobbin into the bobbin case, ensuring it clicks into place. Refer to the SQ9185 manual’s diagrams for visual guidance on correct threading and bobbin insertion.
Threading the Upper Thread
Correct upper threading is essential for smooth operation of your Brother SQ9185. Start by raising the presser foot; this opens the tension discs. Place the thread spool on the spool pin and secure it with the spool cap. Guide the thread down through the first thread guide, then through the tension discs, ensuring it clicks into place.
Continue threading through the take-up lever, then down and around the thread guide on the machine head. Next, thread the needle from front to back. A built-in needle threader simplifies this process – utilize it for ease! Ensure the thread is fully inserted into the needle eye.
Draw a sufficient length of thread through the needle (approximately 6-8 inches). Hold the thread tail gently as you begin sewing. Refer to the SQ9185 manual’s detailed diagrams for a visual guide to ensure accurate threading. Incorrect threading can lead to skipped stitches or tension issues.
Threading the Lower Thread
Proper lower threading is crucial for balanced stitch formation on your Brother SQ9185. Begin by opening the bobbin cover located underneath the sewing machine; Remove the bobbin case and insert a pre-wound bobbin, ensuring it rotates in the correct direction (clockwise, typically).
Guide the thread through the tension slot on the bobbin case, then thread it through the thread guide. Reinsert the bobbin case into the machine, ensuring it clicks securely into place. Gently pull on the thread tail to confirm it’s properly engaged with the tension mechanism.
Raise the needle to its highest position using the handwheel. Continue to pull the thread tail upwards; this will bring the bobbin thread up through the needle plate. Use the needle to grab the upper thread and pull both threads under the presser foot. Consult the SQ9185 manual for detailed illustrations.
Basic Sewing Operations
Mastering fundamental techniques unlocks the SQ9185’s potential. Select stitches, adjust length/width, utilize reverse, and practice seam starts/ends for quality results.
Selecting Stitch Patterns
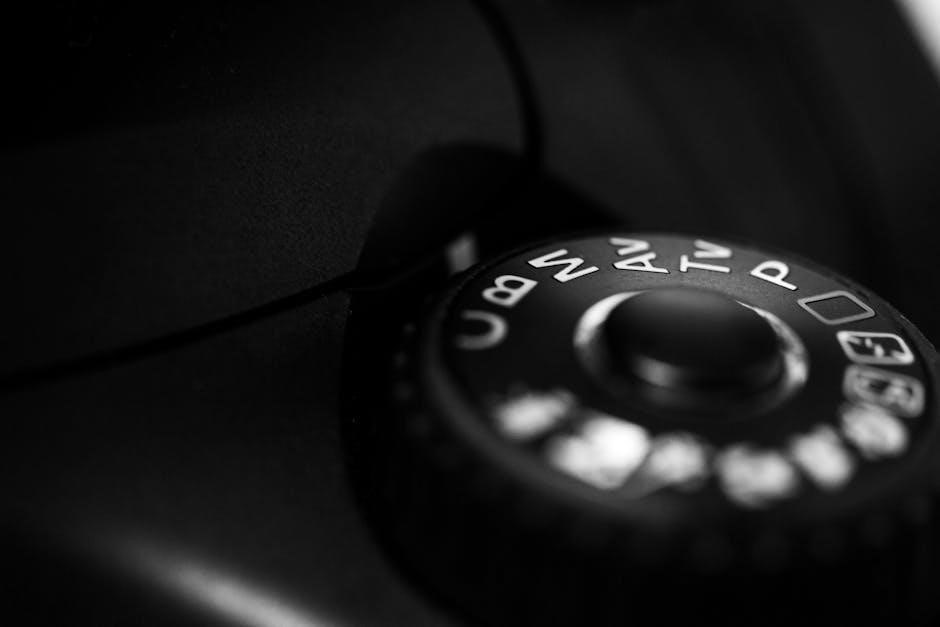
The Brother SQ9185 boasts a variety of built-in stitch patterns, catering to diverse sewing needs. Accessing these patterns is straightforward using the stitch selection dial, typically located on the front of the machine. The manual clearly illustrates each stitch, categorizing them for easy identification – including straight stitch, zigzag stitch, blind hem stitch, and decorative stitches.
To select a stitch, simply rotate the dial to the desired pattern number. The selected stitch will be displayed on the LCD screen, providing a visual confirmation. Experimenting with different stitches is encouraged to discover their unique applications. For instance, a zigzag stitch is ideal for finishing raw edges and creating stretchable seams, while decorative stitches add a personalized touch to projects.
Remember to consult the SQ9185 manual for a complete list of available stitches and their recommended settings. Understanding the purpose of each stitch will significantly enhance your sewing projects and allow you to achieve professional-looking results. The machine’s versatility makes it suitable for both beginners and experienced sewers alike.
Adjusting Stitch Length and Width
Precise control over stitch length and width is crucial for achieving optimal sewing results with the Brother SQ9185. These adjustments directly impact the fabric’s appearance and the seam’s strength. The stitch length dial, usually positioned near the stitch selection dial, allows you to modify the distance between each stitch. Shorter stitch lengths are ideal for delicate fabrics and intricate details, while longer lengths are suitable for heavier materials and quicker sewing.
Similarly, the stitch width dial controls the breadth of zigzag and decorative stitches. Increasing the width creates a broader stitch, useful for securing edges or adding prominent embellishments. The SQ9185 manual provides recommended settings for various fabrics and stitch types, serving as a valuable guide.
Always test your settings on a scrap piece of fabric before starting your project. This ensures the chosen stitch length and width are appropriate for the material and desired outcome. Fine-tuning these parameters allows for customized sewing and professional-quality finishes.
Reverse Sewing
Reverse sewing, often used for securing seams, is a fundamental technique on the Brother SQ9185. It reinforces the beginning and end of a stitch line, preventing unraveling and ensuring durability. The SQ9185 features a dedicated reverse stitch button or lever, conveniently located for easy access during sewing. Pressing this control temporarily switches the machine to sew in reverse.
Typically, a few stitches in reverse are sufficient to secure a seam. Avoid excessive reverse stitching, as it can create bulkiness and potentially damage the fabric. The manual recommends a short backstitch length for optimal reinforcement.
Practice using the reverse function on scrap fabric to become comfortable with its operation. Smooth transitions between forward and reverse sewing are key to creating neat, professional-looking seams. Mastering this technique is essential for any sewing project, guaranteeing a long-lasting and polished finish.
Starting and Ending a Seam
Properly starting and ending a seam is crucial for a professional finish on the Brother SQ9185. Begin by gently holding the fabric edges together, guiding it under the presser foot. Initiate sewing slowly, allowing the machine to establish a consistent stitch. Avoid pulling or pushing the fabric; let the feed dogs do the work.
To begin, a small backstitch (using the reverse function) secures the thread at the seam’s start. At the seam’s end, also backstitch for reinforcement. This prevents unraveling during use and washing. The manual emphasizes a consistent sewing speed for even stitches.
Trim excess threads close to the fabric after completing the seam. A neat finish enhances the garment’s appearance and longevity. Practice these techniques on scrap fabric to build confidence and achieve consistently high-quality results with your SQ9185.
Advanced Features & Techniques
Unlock the SQ9185’s full potential with features like needle up/down, speed control, and adjustable presser foot pressure for varied fabrics and techniques.
Using the Needle Up/Down Function
The Brother SQ9185’s needle up/down function is a fantastic feature for quilters and those working with multiple layers of fabric. This allows you to precisely stop the needle either in the up or down position, offering greater control and convenience during your sewing projects.
To activate this function, locate the dedicated button – often depicted with an up and down arrow – on the machine’s control panel. Pressing this button toggles between the two positions. When set to ‘needle down’, the needle will automatically stop in the lowered position at the end of each stitch or when you lift the presser foot. This is incredibly useful for pivoting fabric, creating precise corners, or stopping mid-seam without the fabric shifting.
Conversely, setting it to ‘needle up’ stops the needle in the raised position. This is helpful when you need to easily remove the fabric from the machine or when starting a new seam. Experiment with both settings to discover which best suits your sewing style and project requirements. Remember to consult your SQ9185 manual for specific button locations and detailed instructions tailored to your machine’s model.
Speed Control
The Brother SQ9185 offers adjustable speed control, a crucial feature for both beginners and experienced sewers. This allows you to tailor the sewing speed to your comfort level and the demands of the fabric and project. Controlling the speed is essential for precision and preventing errors, especially when navigating intricate designs or delicate materials.
The speed control is typically implemented as a slider located near the foot pedal. Sliding it towards the ‘slow’ setting reduces the maximum sewing speed, providing greater control for detailed work or when learning new techniques. Conversely, moving it towards the ‘fast’ setting increases the speed for quicker completion of simpler seams.
Beginners will find the slower speed invaluable for mastering basic stitches and maintaining accurate seam allowances. More experienced users can utilize the faster speed for efficient completion of larger projects. Always refer to your SQ9185 manual for the precise location of the speed control slider and recommended settings for different fabrics. Practicing with various speeds will help you find the optimal setting for each task.
Adjusting Presser Foot Pressure
Proper presser foot pressure is vital for achieving consistent, high-quality stitches with the Brother SQ9185. Incorrect pressure can lead to issues like skipped stitches, puckered fabric, or thread breakage. The SQ9185 allows you to adjust this pressure to accommodate different fabric weights and types.
Lighter fabrics, such as silk or chiffon, require lower pressure to prevent puckering and fabric feed issues. Heavier fabrics, like denim or canvas, need higher pressure to ensure the feed dogs effectively grip and move the material. The adjustment dial is usually located on the back of the machine, clearly marked with a range of settings.
Consult your SQ9185 manual for specific recommendations on pressure settings for various fabrics. Start with a lower setting and gradually increase it until you achieve consistent stitch formation without fabric distortion. Test on a scrap piece of fabric before beginning your project. Experimentation is key to finding the optimal pressure for your materials and desired results.
Free Motion Quilting with the SQ9185
The Brother SQ9185 excels in free motion quilting, offering creative control for intricate designs. This technique involves lowering the feed dogs, allowing you to move the fabric freely under the needle. The ‘needle up/down’ function, a key feature, is incredibly useful for this, stopping the needle in the down position for smooth transitions.
To begin, attach a darning foot (also known as a free motion foot). Lower the feed dogs using the designated lever or button. Select a stitch, and adjust the stitch length to zero. Slowly lower the presser foot and begin gently guiding the fabric, creating your desired pattern.
Speed control is crucial; start slowly to gain control. Refer to your SQ9185 manual for detailed instructions and recommended settings. Practice on a quilt sandwich (top, batting, and backing) to get comfortable with the technique. Online resources and Facebook groups dedicated to the SQ9185 offer valuable tips and inspiration.

Maintenance and Troubleshooting
Regular cleaning prevents issues, removing dust and thread buildup around sensors and gears. The SQ9185 manual details oil points and solutions for common problems like thread breakage.
Cleaning the SQ9185 (Removing Dust & Thread)
Maintaining a clean sewing machine is crucial for optimal performance. The Brother SQ9185, like all sewing machines, accumulates dust and thread lint over time, particularly in areas like the bobbin case, feed dogs, and around the sensors. Refer to your SQ9185 manual for specific cleaning instructions, but generally, begin by powering off and unplugging the machine.
Use a soft brush – often included with the machine – to gently remove lint and dust from accessible areas. A small vacuum cleaner with a brush attachment can also be helpful, especially for reaching tight spaces. Pay close attention to the bobbin area, removing any accumulated thread or fuzz.
For stubborn buildup, a slightly dampened (not wet!) cloth can be used. Avoid using harsh chemicals or abrasive cleaners, as these can damage the machine’s components. The manual emphasizes cleaning around the sensors, as dust can interfere with their operation. Regular cleaning, even a quick brush-off after each use, will significantly extend the life of your SQ9185 and ensure smooth, reliable sewing.
Oil Points and Lubrication
Proper lubrication is essential for the smooth operation of your Brother SQ9185. However, modern computerized sewing machines, including the SQ9185, generally require minimal oiling. Consult your SQ9185 manual before attempting any lubrication, as over-oiling can attract dust and cause more problems than it solves.
Typically, the manual will identify specific oil points – often small holes or areas near the bobbin hook and other moving parts. Use only sewing machine oil, never household oil, as it’s formulated to prevent gumming and corrosion. Apply a very small drop of oil to each designated point, and then operate the machine briefly to distribute the oil.
Avoid oiling the tension discs or feed dogs. The manual will likely advise against lubricating these areas. Regular cleaning, as described previously, is often sufficient to maintain their functionality. If you’re unsure about any aspect of lubrication, it’s best to consult a qualified sewing machine technician to avoid damaging your SQ9185.
Troubleshooting Common Issues (Thread Breakage, Skipped Stitches)
Thread breakage and skipped stitches are common sewing frustrations. First, re-thread both the upper and lower threads, ensuring correct threading paths as detailed in your SQ9185 manual. Use good quality thread appropriate for your fabric. Check the needle – a bent or dull needle is a frequent culprit; replace it with a new one of the correct size and type.
Skipped stitches often indicate incorrect needle insertion or a damaged needle plate. Ensure the needle is fully inserted and securely tightened. Clean around the bobbin area, removing any lint or dust accumulation, as seen in online repair videos. Adjust the presser foot pressure; too much or too little pressure can cause issues.
Consult the troubleshooting section of your SQ9185 manual for specific error codes or solutions. Online Facebook groups dedicated to Brother sewing machines can also offer valuable advice from experienced users facing similar problems.
Replacing the Needle
Regular needle replacement is crucial for optimal sewing performance. Always power off and unplug your Brother SQ9185 before changing the needle. Locate the needle screw on the needle clamp – loosen it with the screwdriver included with your machine. Gently pull the old needle downwards.
Insert the new needle with the flat side facing the back, ensuring it’s pushed up as far as it will go into the needle clamp. Tighten the needle screw securely, but avoid over-tightening. Refer to your SQ9185 manual for a diagram illustrating correct needle insertion.
Use only Brother-approved needles or high-quality compatible needles. Different fabrics require different needle types (universal, ballpoint, denim, etc.). Discard used needles safely to prevent injury. A dull or bent needle can cause skipped stitches and damage fabric.

Accessories and Compatibility
The SQ9185 works with various presser feet, enhancing its versatility. Explore optional accessories to expand capabilities,
and check compatibility with similar Brother models like the XL2120.
Compatible Presser Feet
Expanding the functionality of your Brother SQ9185 is easily achieved through compatible presser feet. The standard zig-zag foot, included with the machine, handles most everyday sewing tasks effectively. However, a world of specialized techniques opens up with additional feet.
A buttonhole foot is essential for creating professional-looking buttonholes, ensuring consistent size and shape. For quilting enthusiasts, a walking foot is invaluable, providing even fabric feed and preventing layers from shifting. A clear/invisible zipper foot simplifies the process of inserting invisible zippers with precision.
Other useful options include a blind hem foot for creating nearly invisible hems, an overcasting foot for finishing raw edges, and a gathering foot for creating ruffles and gathers. Many universal snap-on presser feet designed for Brother machines are compatible, offering a wide range of choices. Always verify compatibility before purchasing to ensure a secure fit and optimal performance. Online resources and sewing communities, like the Facebook group mentioned, can provide valuable insights into recommended presser feet for specific projects.
Optional Accessories for the SQ9185
Beyond the standard inclusions, several optional accessories can significantly enhance your Brother SQ9185 experience. A quilting ruler set aids in precise fabric cutting and piecing, crucial for intricate quilt designs. Extension tables expand the sewing surface, providing more room for larger projects like quilts or curtains, improving maneuverability and control.
A seam guide ensures consistently straight seams, particularly helpful for beginners or lengthy sewing sessions. Various needle packs, tailored for different fabric types (denim, stretch, embroidery), optimize stitch quality. A lint brush and seam ripper are practical additions for maintenance and correcting mistakes.
Consider a knee lift for hands-free presser foot lifting, ideal for free-motion quilting. Some users also explore embroidery hoops and software for adding personalized embellishments. Exploring online forums and communities, like the referenced Facebook group, reveals user-recommended accessories and their practical applications, helping you tailor your SQ9185 setup to your specific sewing needs.
SQ9185 vs. Similar Brother Models (Star 27S, Star 37S, XL2120, XL2120PRO, XL2121, Vesta Ministar Series)
Comparing the SQ9185 to other Brother models reveals key distinctions. The Star 27S and 37S are generally more basic, lacking the SQ9185’s computerized features and stitch variety. The XL2120, XL2120PRO, and XL2121 offer similar functionality but often at a higher price point, with the PRO version adding more built-in stitches.
The Vesta Ministar series (Pink, Blue, Rose Violet, Rose Wine) are compact and beginner-friendly, prioritizing portability over advanced features. The SQ9185 strikes a balance, providing a robust set of computerized functions without the premium cost of higher-end models.
Users often choose the SQ9185 for its versatility and value. While models like the XL2120PRO boast more stitches, the SQ9185 adequately covers most sewing needs. Ultimately, the best choice depends on individual requirements and budget, with the SQ9185 frequently highlighted as a favorite among experienced sewers.
Resources and Support (Online Manuals, Facebook Groups)
Finding support for your Brother SQ9185 is readily achievable through various online resources. While a dedicated official online manual may require searching the Brother website, numerous user-created guides and videos are available on platforms like YouTube, offering step-by-step instructions and troubleshooting tips.
A particularly valuable resource is the active Facebook group dedicated to Brother sewing machines (https://www.facebook.com/groups/993716917469499/); This community provides a platform for users to share experiences, ask questions, and receive assistance from fellow SQ9185 owners.
These groups often contain solutions to common issues, like thread breakage or skipped stitches, and offer advice on maintenance and accessory compatibility. Leveraging these online communities can significantly enhance your SQ9185 experience, providing a wealth of knowledge and peer support beyond the standard documentation.