
Keurig Single Serve Coffee Maker Instructions: A Comprehensive Guide
Embark on a delightful coffee journey! This guide unlocks the full potential of your Keurig, offering detailed instructions for brewing perfect, single-serve cups effortlessly and consistently.
Understanding Your Keurig Model

Keurig offers a diverse range of single-serve coffee makers, each designed with unique features to cater to different preferences. From the classic K-Classic to the advanced K-Elite and the compact K-60, understanding your specific model is crucial for optimal performance.
Key differences lie in features like brew strength control, iced coffee capabilities, water reservoir size, and programmable settings. The K-Elite, for instance, boasts a strong brew option and dedicated iced coffee setting, while the K-60 prioritizes simplicity and affordability. Familiarize yourself with the buttons, display panel, and removable parts specific to your Keurig.
Refer to your model’s user manual for a detailed diagram and explanation of all components. Knowing these distinctions will streamline the brewing process and ensure you’re utilizing all the functionalities your Keurig has to offer, ultimately enhancing your coffee experience.
Identifying Keurig K-Cup Pod Compatibility
Keurig brewers are designed primarily for use with K-Cup pods, offering a vast selection of coffee, tea, hot chocolate, and other beverages. However, not all K-Cup pods are created equal, and compatibility is key to a successful brew. Most Keurig models are compatible with standard K-Cup pods, easily identifiable by their standardized size and shape.
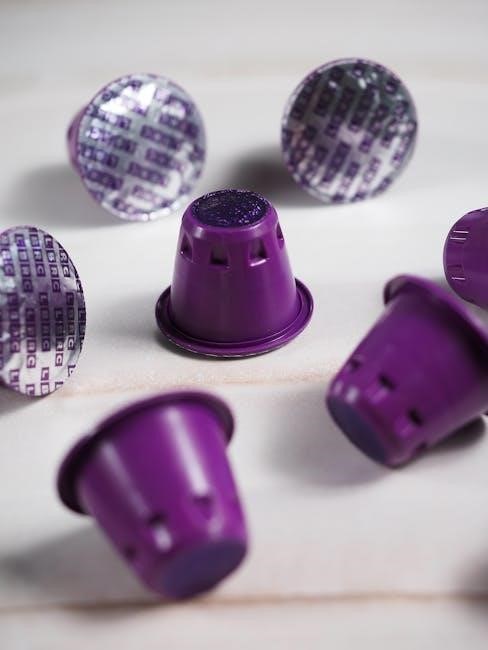
Keurig 2.0 brewers introduced a new pod technology requiring either 2.0 K-Cup pods or the use of a My K-Cup Universal Reusable Filter for older-style pods. Always check your brewer’s specifications to determine which pods are supported. Using incompatible pods can lead to improper brewing or even damage to your machine.
Beyond official K-Cup pods, numerous third-party brands offer compatible options. Ensure these pods are specifically labeled as compatible with Keurig brewers to avoid issues. Prioritizing compatible pods guarantees a flavorful and hassle-free brewing experience.
Initial Setup & First Use
Before enjoying your first cup, proper setup is crucial. Begin by unpacking your Keurig and removing all packaging materials. Locate a stable, level surface near a power outlet for placement. Thoroughly rinse the water reservoir, drip tray, and K-Cup pod holder with warm, soapy water, then rinse again.
Next, plug in your Keurig and follow the on-screen prompts for initial setup, which typically includes selecting your language and water hardness settings. The machine will then guide you through a series of rinsing brews to cleanse the internal components. This initial rinsing process is vital for optimal performance and flavor.
Discard the water from each rinsing brew before proceeding. Once the rinsing cycle is complete, your Keurig is ready for its first official brew! Refer to subsequent sections for detailed instructions on filling the reservoir and brewing your favorite beverage.
Filling the Water Reservoir
Maintaining optimal water levels is key to a great brew. Locate the water reservoir, typically at the back or side of your Keurig. Remove the reservoir from the machine – most models feature a convenient handle for easy removal. Rinse the reservoir with fresh water before each filling to ensure purity.
Fill the reservoir with fresh, filtered water to the desired level, observing the maximum fill line indicated on the reservoir. Avoid overfilling, as this can cause leaks or affect brewing performance. For best results, use filtered water to minimize scale buildup and enhance coffee flavor.
Carefully reinsert the water reservoir back into the Keurig, ensuring it’s securely seated. The machine will not operate if the reservoir is not properly positioned. Regularly check the water level and refill as needed for continuous brewing enjoyment.
Placing the Drip Tray
Protect your countertop from spills with proper drip tray placement. Locate the drip tray, usually positioned beneath the coffee dispensing nozzle. Ensure the drip tray is correctly aligned with the designated slots on the Keurig base. It should slide or snap into place securely, preventing accidental movement during brewing.
The drip tray consists of two parts: the main tray to catch drips and a removable cover. The cover helps prevent splashing and accommodates various cup sizes. Adjust the drip tray height if necessary, depending on the size of your mug or travel tumbler. Some models offer adjustable height settings for greater flexibility.
Regularly empty and clean the drip tray to prevent overflow and maintain hygiene. Remove the tray and cover, rinse them with warm, soapy water, and dry thoroughly before reassembling. A clean drip tray ensures a tidy brewing experience.
Brewing Your First Cup of Coffee
Now for the best part – enjoying your first cup! With the water reservoir filled and the drip tray in place, you’re ready to brew. The process is remarkably simple, designed for quick and convenient coffee making. Before starting, ensure the Keurig is properly powered on and has completed its initial heating cycle, indicated by a steady light.
The core of Keurig brewing revolves around K-Cup pods. These single-serve containers hold pre-portioned coffee grounds, ensuring consistent flavor. Once a pod is inserted (detailed in the next section), select your desired brew size – typically 6, 8, or 10 ounces – using the corresponding buttons on the Keurig.
Press the brew button to initiate the process. The Keurig will pierce the K-Cup pod and pump hot water through it, delivering freshly brewed coffee directly into your mug. Enjoy the aroma and savor the convenience!
Inserting a K-Cup Pod
The K-Cup pod is the heart of the Keurig brewing system. To begin, lift the Keurig’s handle located on the side of the brewer. This action reveals the K-Cup pod holder. Select your favorite K-Cup pod flavor – Keurig offers a vast selection! – and carefully remove the foil lid. Do not pierce the pod yourself.
Align the K-Cup pod with the holder, ensuring it sits securely and evenly. Gently close the handle, firmly locking the pod into place. The Keurig is designed to automatically pierce the pod during the brewing process, so avoid attempting to do this manually. A properly inserted pod will feel snug and stable within the holder.
Confirm the handle is fully closed before initiating the brew cycle. An improperly sealed handle can result in leaks or incomplete brewing. Now you’re ready to select your brew size and enjoy!
Selecting Brew Size
Tailor your cup to your preference! After inserting your K-Cup pod and closing the handle, the Keurig presents you with brew size options. Most models feature buttons clearly labeled with sizes like 6oz, 8oz, 10oz, and sometimes even 12oz. Consider the strength of your chosen K-Cup and your desired coffee intensity when making your selection.
For a bolder, more concentrated brew, opt for a smaller cup size, such as 6oz. This extracts more flavor from the pod. If you prefer a milder, larger serving, choose 10oz or 12oz. Experiment to discover your ideal balance!
Simply press the corresponding button for your desired brew size. The Keurig will then begin the brewing process, dispensing hot water through the K-Cup pod and into your mug. Enjoy the aroma and anticipation of your freshly brewed coffee!
Keurig K-Elite Specific Instructions
Unlock the premium features of your K-Elite! This model boasts advanced functionalities for a truly customized coffee experience. Beyond standard brewing, the K-Elite offers a ‘Strong Brew’ option and dedicated iced coffee capabilities, elevating your daily routine.
The K-Elite’s intuitive control panel allows for precise adjustments. Explore the settings to personalize brew strength and temperature. Its large water reservoir and sleek design make it a standout addition to any kitchen. Remember to regularly descale your K-Elite to maintain optimal performance and longevity.
Take advantage of the programmable features to schedule brews in advance, ensuring a fresh cup awaits you each morning. The K-Elite is designed for convenience and consistently delivers exceptional coffee quality.
Using the Strong Brew Button
Enhance your coffee’s intensity with the Strong Brew button! This feature, exclusive to certain Keurig models like the K-Elite, allows for a bolder, more robust flavor profile. When activated, the K-Elite slows down the brewing process, ensuring maximum extraction from your K-Cup pod.
To utilize Strong Brew, simply press the button before initiating the brew cycle. A corresponding indicator light will illuminate, confirming activation. This is ideal for dark roast coffees or for those who prefer a particularly strong cup. Experiment with different K-Cup varieties to discover your perfect strength.
Remember that using Strong Brew may slightly increase brew time. It’s a fantastic way to customize your coffee to your exact preferences, delivering a richer, more satisfying experience with every sip.
Iced Coffee Brewing with K-Elite
Beat the heat with refreshing iced coffee, effortlessly brewed with your Keurig K-Elite! This model boasts a dedicated Iced Coffee setting, designed to deliver a perfectly chilled and flavorful beverage. The process involves brewing a concentrated coffee over ice, preventing a watered-down taste.
To brew iced coffee, fill your mug with ice to the fill line. Select the “Iced” brew option on your K-Elite. Insert your desired K-Cup pod and initiate the brew. The K-Elite will automatically adjust the brew volume and strength for optimal iced coffee results.
For an even more customized experience, experiment with different K-Cup varieties and ice levels. Enjoy a cool, invigorating coffee treat any time of day, thanks to the K-Elite’s convenient iced coffee function!
Keurig K-60 Specific Instructions
Welcome to streamlined brewing with your Keurig K-60! This model offers a user-friendly experience, focusing on simplicity and consistent coffee quality. Understanding its specific features will ensure you get the most out of your machine.
The K-60 prioritizes ease of use, featuring a straightforward control panel and a compact design. It’s perfect for smaller spaces and quick, single-cup brewing. Key differences from other models include a slightly simpler interface and fewer programmable options, focusing on core functionality.
To maximize your K-60 experience, pay close attention to the water reservoir fill level and ensure proper K-Cup pod insertion. Regular cleaning, as outlined in the maintenance section, is crucial for optimal performance and longevity. Enjoy consistently delicious coffee with your reliable K-60!
Water Filter Installation (K-60)
Enhance your coffee’s flavor and your Keurig K-60’s lifespan with a fresh water filter! Installing the filter is a simple process that significantly improves water quality, reducing chlorine and impurities for a cleaner, brighter brew. Begin by ensuring your Keurig is unplugged and the water reservoir removed.
The filter comes in two parts: the filter cartridge and a plastic holder. Attach the filter cartridge securely to the plastic holder. Then, place the assembled filter into the designated slot within the water reservoir. Ensure it clicks into place for a secure fit.
Before first use with the filter, brew a full reservoir of water, discarding the brewed water. This primes the filter and removes any loose particles. Replace the filter every two months, or after 60 tanks, for optimal performance. Enjoy noticeably better-tasting coffee!
Adjusting Brew Temperature (K-60)
Personalize your coffee experience with the K-60’s temperature adjustment feature! Achieving the ideal brewing temperature is crucial for extracting the full flavor profile of your favorite K-Cup pod. To access this setting, begin by ensuring your Keurig K-60 is powered on.
Navigate to the settings menu by pressing and holding the brew button for three seconds. Use the up and down arrow buttons to cycle through the available temperature options – typically ‘Low’, ‘Medium’, and ‘High’. ‘Medium’ is the default setting.
Experiment to find your preference! Lower temperatures are ideal for lighter roasts, preserving delicate flavors, while higher temperatures are better suited for darker roasts, maximizing boldness. Once selected, press the brew button again to confirm your choice. Enjoy a perfectly heated cup, tailored to your taste!
Maintenance & Cleaning
Regular maintenance ensures optimal performance and longevity of your Keurig! Consistent cleaning prevents mineral buildup and residue that can affect brew quality and potentially damage the machine. A clean Keurig delivers consistently delicious coffee, cup after cup.
Focus on descaling and removable parts. Descaling, typically every 3-6 months depending on water hardness, removes calcium deposits. Use a Keurig Descaling Solution or a vinegar-water mixture, following the machine’s descaling instructions carefully.
Daily cleaning is also vital! Removable parts like the drip tray, K-Cup pod holder, and water reservoir should be washed regularly with warm, soapy water. Rinse thoroughly and ensure they are completely dry before reassembling. A little care goes a long way!
Descaling Your Keurig
Descaling is crucial for removing mineral buildup! Over time, minerals from water accumulate inside your Keurig, impacting brewing performance and coffee taste. Descaling typically needs to be done every 3-6 months, depending on your water hardness – more frequently with hard water.
Follow these steps for effective descaling: First, empty the water reservoir and add the Keurig Descaling Solution (or a mixture of equal parts white vinegar and water) to the reservoir. Run a full brewing cycle without a K-Cup pod. Repeat this several times.
Rinse thoroughly! After descaling, rinse the reservoir completely with fresh water and run several more brewing cycles with only water to remove any lingering descaling solution or vinegar taste. This ensures a clean, fresh brew every time.
Cleaning Removable Parts
Regular cleaning keeps your Keurig hygienic and functioning optimally! Several parts require routine cleaning to prevent buildup and ensure the best-tasting coffee. These include the water reservoir, drip tray, K-Cup pod holder, and exit needle.
Wash with warm, soapy water: Remove these parts and wash them thoroughly with warm water and mild dish soap. For the K-Cup pod holder and exit needle, use a soft brush to remove any coffee grounds or residue. The drip tray should be emptied and cleaned after each use to prevent overflow.
Ensure complete drying: Before reassembling, allow all parts to air dry completely. Avoid abrasive cleaners or scouring pads, as they can damage the plastic components. Consistent cleaning extends your Keurig’s lifespan and maintains coffee quality.
Troubleshooting Common Issues
Encountering problems? Don’t worry, many are easily resolved! This section addresses frequent Keurig issues and provides simple solutions to get you back to enjoying your coffee. Common problems include the Keurig not brewing, or issues with K-Cup pod recognition.
Keurig won’t brew: First, ensure the water reservoir is filled and properly seated. Check if the Keurig is turned on and the power cord is securely plugged in. If the issue persists, try descaling (see Maintenance section). K-Cup pod problems: Verify the pod is correctly inserted and isn’t damaged. Clean the entrance and exit needles to remove any obstructions.
Still facing issues? Consult the full user manual or Keurig’s support website for more detailed troubleshooting steps and potential solutions. A quick check of these basics often resolves most common concerns.
Keurig Not Brewing
Frustrated your Keurig isn’t brewing? Let’s diagnose the issue! The most common cause is insufficient water – double-check the reservoir is filled to the minimum line and correctly positioned. Ensure the Keurig is firmly switched on and the power cord is securely connected to a working outlet.
If water is present and power is confirmed, the problem might be a blockage. Run a cleaning cycle or descale your Keurig (refer to the Maintenance section) to remove mineral buildup. A clogged exit needle can also prevent brewing; carefully clean it with a paperclip.
Persistent issues? Try a hard reset by unplugging the Keurig for 60 seconds, then plugging it back in. If none of these steps resolve the problem, consult Keurig’s customer support for further assistance.
K-Cup Pod Issues
Experiencing problems with your K-Cup pods? Several factors can cause brewing difficulties. First, verify you’re using a compatible K-Cup pod – some third-party pods may not function correctly with your Keurig model. Ensure the pod is properly inserted into the K-Cup holder, seated firmly but not forced.
If the Keurig detects an issue with the pod, it may not pierce it correctly. Gently remove the pod and inspect it for damage or blockage. Try a different pod to rule out a faulty individual unit. A damaged K-Cup holder can also cause problems; inspect it for cracks or debris.
Occasionally, the pod may be too old or improperly sealed, affecting brewing. Store your K-Cups in a cool, dry place to maintain freshness and optimal performance.
Advanced Features & Settings
Unlock the full potential of your Keurig with its advanced features! The Auto-Off Function conserves energy by automatically powering down the brewer after a period of inactivity – a customizable setting for convenience. Explore Programmable Features to tailor your brewing experience.
Many Keurig models allow you to adjust brew temperature, strength, and even program start times. Dive into the settings menu to discover options for customizing your perfect cup. Some models offer a ‘bold’ brew setting for a richer, more intense flavor.
Don’t forget to explore the altitude setting if you live at a high elevation, ensuring optimal brewing performance. Regularly check for firmware updates to access the latest features and improvements for your Keurig brewer.
Auto-Off Function

Conserve energy and enhance safety with your Keurig’s Auto-Off Function! This incredibly useful feature automatically powers down your brewer after a pre-set period of inactivity, preventing accidental overheating and reducing energy consumption. The default auto-off time is typically around one hour, but many models allow you to customize this setting to suit your preferences.
Access the settings menu on your Keurig to adjust the auto-off timer. You might be able to choose from options like 30 minutes, 1 hour, 2 hours, or even disable the function entirely. Remember that enabling the auto-off function is a great way to promote responsible energy use and peace of mind.
Always ensure the brewer is completely cool before storing it, even with the auto-off function enabled.
Programmable Features
Unlock a personalized brewing experience with your Keurig’s programmable features! Many Keurig models offer the ability to customize your coffee routine, allowing you to wake up to a freshly brewed cup or enjoy a perfectly timed beverage throughout the day. Explore settings like auto-brew, which lets you schedule brewing in advance, and customizable brew temperatures for optimal flavor extraction.
Access the programmable settings through your Keurig’s menu system. You can typically set the brew time, brew strength, and even create custom brew sizes. Some models also allow you to save multiple user profiles, each with their own preferred settings. Experiment with these features to discover your ideal coffee experience!
Refer to your specific model’s manual for detailed instructions on accessing and utilizing these programmable options.
Keurig K-Cup Recycling Program
Join Keurig’s commitment to sustainability by participating in their K-Cup pod recycling program! Recognizing the environmental impact of single-serve coffee, Keurig has established a comprehensive system to responsibly manage used K-Cup pods. The program aims to divert pods from landfills and repurpose the materials.
Currently, the program involves several options, including mail-back recycling and drop-off locations. Check the Keurig website for the most up-to-date information on participating retailers and collection points near you. Prepare your pods by emptying any remaining grounds and removing the foil lid (if applicable) as per program guidelines.
By actively participating, you contribute to a circular economy and help reduce waste. Visit Keurig’s website for detailed instructions, downloadable recycling labels, and a complete list of frequently asked questions regarding the program.
Safety Precautions
Prioritize safety when operating your Keurig! Always ensure the appliance is placed on a stable, level surface, away from water sources and hot surfaces. Never immerse the Keurig in water or any other liquid to prevent electric shock. Exercise caution when handling hot liquids and steam emitted during brewing – burns can occur.
Avoid operating the Keurig with a damaged cord or plug. If damaged, discontinue use immediately and contact Keurig customer support. Do not attempt to disassemble or repair the appliance yourself; this could void the warranty and pose a safety hazard. Keep the appliance out of reach of children and pets.
Always unplug the Keurig before cleaning or performing maintenance. Allow the appliance to cool completely before handling any hot components. Read all instructions carefully before first use and adhere to all safety warnings provided in this manual.
Warranty Information
Your Keurig is protected by a limited warranty! Keurig warrants this single-serve coffee maker to be free from defects in materials and workmanship under normal household use for a period of one year from the date of purchase. This warranty covers manufacturing defects, not damage resulting from misuse, accidents, or unauthorized repairs.
To make a warranty claim, retain your proof of purchase and contact Keurig customer service. They will guide you through the process, which may involve troubleshooting steps or returning the appliance for inspection. The warranty does not cover consumable parts like water filters or descaling solutions.
Keurig reserves the right to repair or replace the defective product at its discretion. This warranty gives you specific legal rights, and you may have other rights that vary by location. For complete warranty details, please visit the official Keurig website or refer to the warranty card included with your appliance.